
This has been tested successfully on macOS Sierra. I put NTFS in another disk partition (also works for mobile HDD). There are many similar articles on the Internet, but none of them said the test was successful, probably because of different system versions. I couldn’t index NTFS disk, even after we tried to recreate system index, there were still missing files for unknown.
Return to the subject, here are the steps:
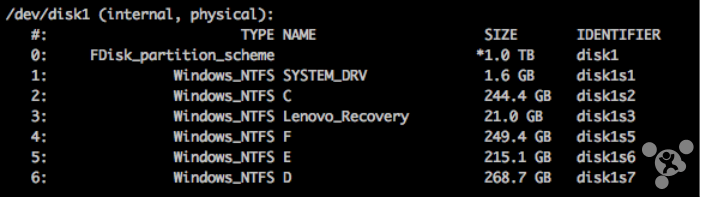
1. Open the Terminal, enter the following command to view disk information – your partitions under Name (Mine are C, D, E, F).
diskutil list
2. Check /etc/fstab files – fstab is a text file, which should be empty if it hasn’t been modified. This file is used to configure file system, and all your plug-in partitions must be in this file, otherwise they won’t be added the next time you start up. You’re suggested using Notepad to modify, just enter the this command:
sudo nano /etc/fstab
Then enter the system password (it will skip if no password has been set), you will see the file content.
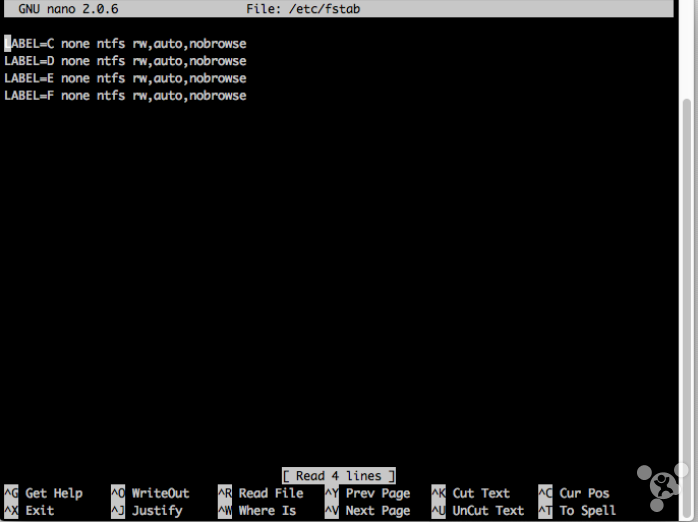
3. Type the following commands. The “C, D, E ,F” represent my NTFS partitions, just replace them with your partition names, each line for one partition. Use \404 to replace blank space in your volume labels if there is any. When you finish typing in these commands, press ctrl + X, and the Notepad will ask you whether to save it. Chooose “yes” and exit.
LABEL=C none ntfs rw,auto,nobrowse
LABEL=D none ntfs rw,auto,nobrowse
LABEL=E none ntfs rw,auto,nobrowse
LABEL=F none ntfs rw,auto,nobrowse
4. Eject the mobile HDD/Plug in the computer, use an uninstall tool for removal, then successively add them in the disk utility.
5. Enter the following command to mount the disk volume lables (If you can’t perform this step, it may not be seen in Finder).
sudo In -s /Volumes ~/Desktop/Volumes